

How To Clean Install Mac Sierra
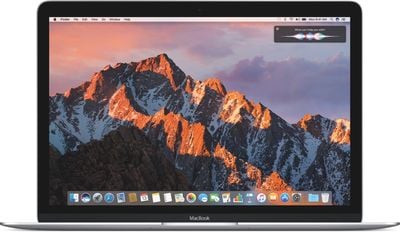
macOS Sierra is Apple's latest desktop operating system, which succeeds Bone X El Capitan and adopts a new name to bring it in line with iOS, watchOS, and tvOS. The Os volition come pre-installed on all new Macs once current stock is depleted and is a gratis download for existing Mac owners.
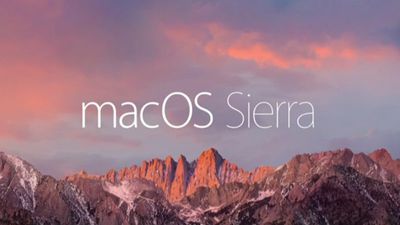
The main new feature in macOS Sierra is deep Siri integration, bringing Apple's personal banana to the Mac for the outset time. It also adds new features to Photos and Messages, and includes Continuity smarts like Universal Clipboard and an Machine Unlock option for Apple Sentry owners.
This tutorial explains how to download macOS Sierra and perform a make clean install, which offers several benefits over the automatic upgrade process included in the installation package.
Benefits of a Clean Install
A clean install can remove annoying quirks and strange behaviors that your Mac may take inherited over fourth dimension due to driver upgrades, wonky apps, and messy installation procedures. Performing a fresh install can also repossess lost deejay space caused past junk files left past third-party apps, and can generally make your Mac feel a lot snappier, enabling you to relive that feeling of booting it upwardly for the first fourth dimension.
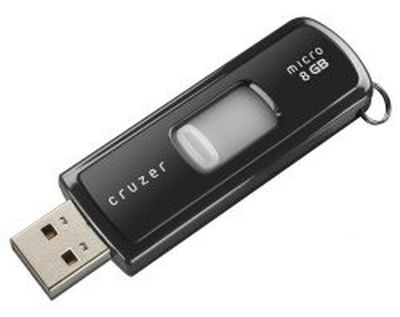 To complete the clean install procedure described below, you'll demand an 8GB or larger USB thumb drive and an 60 minutes or 2 to spare.
You should also perform a full backup of your Mac beforehand using Time Machine. That mode you can restore your system from the Recovery sectionalization if something goes incorrect. Alternatively, save a bootable mirror image of your system to an external drive using a clone utility like SuperDuper! ($27.95) or Carbon Re-create Cloner ($39.99).
Compatibility Bank check
Before you do anything, cheque that your Mac is compatible with Apple's new operating system. macOS Sierra supports the following:
- iMac (Late 2009 or newer)
- MacBook Air (2010 or newer)
- MacBook (Late 2009 or newer)
- Mac mini (2010 or newer)
- MacBook Pro (2010 or newer)
- Mac Pro (2010 or newer)
Another mode of checking if your Mac is compatible is to open the Apple tree carte in the upper left corner of your Mac's screen and selecting Almost This Mac. Await just beneath the Bone X version number in the Overview tab – if the Mac model proper noun is the same or a subsequently model year than the 1 shown in the compatibility listing higher up, your Mac is compatible with Sierra.
Pre-Install Notes
If you desire full control of what data gets transferred to the new OS, you tin can sidestep the Migration Assistant and manually re-create any important files and folders on your existing system to an external drive instead. Information technology's also worth taking a screenshot of your desktop, to serve as a tape of how you like things fix up.
Some users may find it useful to make a notation of the contents of their Applications folder for later reference. A screenshot may suffice (Command-Shift-4, and then Space to capture the Finder window), only if not, the post-obit steps describe a unproblematic way to create a list of apps.
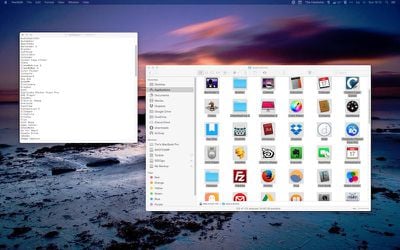
- Open up the Applications binder and press Command+A to select all apps in the Finder window, then printing Command+C.
- Now open up TextEdit, create a new document, select Format -> Brand Obviously Text from the carte bar, and printing Command+V to paste a list of app names into the document.
- If necessary, add together details of download locations for any non-Mac App Store apps you lot apply, suspend whatever serial numbers yous might demand, and save the text document to an external drive.
Be sure to allow any cloud services you utilize to complete synchronization before standing. It's also worth screen-grabbing or noting downwards any custom preferences, settings, Wi-Fi passwords, and app-specific profiles you employ.
Lastly, de-authorize any services on your Mac, including your iTunes account (iTunes card > Store > Deauthorize this Computer), since these are usually limited to a set up number of systems.
Create a Bootable Installer
Download the macOS Sierra installation package from the Mac App Store. In one case it has downloaded, follow these steps to create a USB bootable installer.
- Open Disk Utility (plant in the Applications/Utilities folder), select the thumb drive in the sidebar and click the "Erase" button.
- Proper name the USB drive "Untitled" if it isn't already, choose the Format "OS X Extended (Journaled)", and click "Erase". Once your thumb drive is formatted and the macOS installation package has finished downloading, open upward Terminal (found in Applications/Utilities).
- Now, ensure the USB drive is the merely disk named "Untitled" continued to your Mac, and then paste the following command into the Terminal window, and press Enter: sudo /Applications/Install\ macOS\ Sierra.app/Contents/Resources/createinstallmedia --volume /Volumes/Untitled --applicationpath /Applications/Install\ macOS\ Sierra.app --nointeraction
- You should be prompted for your administrator password. Enter it, and the control will create a bootable Sierra installer on the USB drive. The procedure will take a few minutes to consummate, so exit it running.
Restart and Install
Once the USB installer has been created, restart your Mac and concur downwardly the Option central as soon as you hear the reboot tone. Then follow these steps:
- Use the mouse arrow or the arrow keys on your keyboard to select the disk chosen "Install macOS Sierra" in the bulldoze list that appears on the screen.
- In one case the USB drive has booted, select "Disk Utility" from the Utilities window, cull your Mac'due south startup bulldoze from the listing, and click "Erase".
- When your Mac's startup disk is formatted, return to the Utilities window and select "Install macOS", cull your freshly erased startup drive when asked where to install the OS, and follow the onscreen prompts to complete the installation.
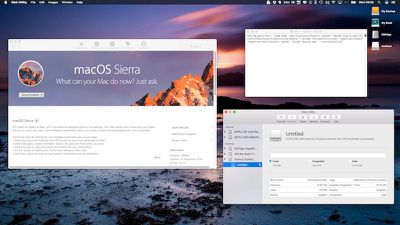
Post-Install Steps
Once the clean installation of macOS Sierra is up and running on your Mac, you can either restore your data from a Time Machine backup using Migration Assistant (institute in Applications/Utilities), or brainstorm restoring your apps, files, and settings manually to get your Mac prepare upwards just the way you lot like it.
Pop Stories
Kuo: iPhone 14 Pro's Larger Camera Crash-land Due to New 48MP Camera System
The increased size of the iPhone 14 Pro and iPhone 14 Pro Max's rear photographic camera array is due to all-new 48-megapixel Wide camera systems, co-ordinate to reputable Apple analyst Ming-Chi Kuo. In a tweet, Kuo responded to leaked schematics recently shared by Max Weinbach. The schematics showed that the rear camera plateau of the iPhone 14 Pro models volition increase by about v pct in each...
Gurman: iPad Pro With 'M2' Flake and MagSafe Charging Likely to Launch in Autumn 2022
Bloomberg'southward Mark Gurman expects next-generation iPad Pro models to launch in the autumn of this year, according to his latest newsletter. In his "Power On" newsletter, Gurman speculated that since Apple tree did not launch new iPad Pros this month at its "Peek Operation" effect, information technology is reasonable to at present expect new models to get in between September and November this year. In a previous report,...
Samsung'due south iMac-Mode 'Smart Monitor M8' With AirPlay At present Available to Pre-Order
Samsung today announced information technology has opened pre-orders for its new Smart Monitor M8, a 32-inch display that offers USB-C charging connectivity, AirPlay support, and several smart TV features congenital into its distinctively iMac-like design. The M8 houses a 4K UHD flat LCD panel providing 400 nits of effulgence, a 60Hz refresh charge per unit, 99% sRGB, HDR back up, and adaptive picture show technology that...
Apple Announces iPhone Driver's Licenses Coming Shortly to These 11 U.S. States
Apple today announced that Arizona residents can at present add their commuter's license or land ID to the Wallet app on the iPhone and Apple Sentry, providing a convenient and contactless mode to display proof of identity or age. Arizona is the first U.S. country to offer this feature to residents, with many other states planning to follow arrange. Apple said that Colorado, Hawaii, Mississippi, Ohio, and...
Apple tree Stores Will Now Decline to Repair iPhones Reported equally Missing
Apple Stores and Apple Authorized Service Providers will now be alerted if an iPhone has been reported as missing in the GSMA Device Registry when a customer brings in the device to exist serviced, according to an internal memo obtained by MacRumors. If an Apple technician sees a message in their internal MobileGenius or GSX systems indicating that the device has been reported as missing, they...
M1 Ultra Mac Studio vs. M1 Max MacBook Pro
If you've been wondering how the elevation-end Mac Studio compares to the highest-end MacBook Pro, look no further, because nosotros have a existent-world usage comparison that doesn't rely solely on benchmarks. Over on YouTube, MacRumors videographer Dan tested both machines with his real globe workflow. Subscribe to the MacRumors YouTube aqueduct for more videos. Dan has been using the M1 Max MacBook Pro to ...

Source: https://www.macrumors.com/how-to/macos-sierra-clean-install/
Posted by: cooperlaisslange.blogspot.com
0 Response to "How To Clean Install Mac Sierra"
Post a Comment